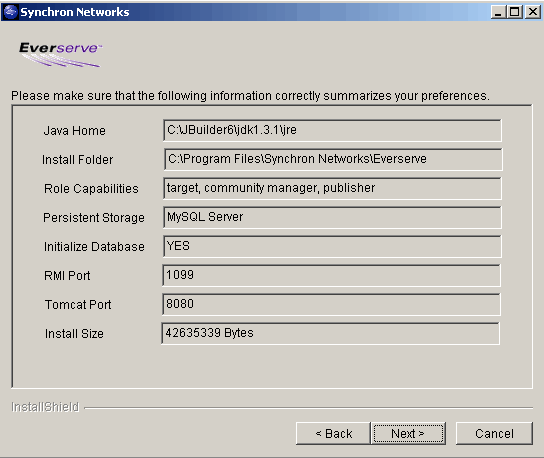

The install program is a straightforward series of dialog boxes that you will navigate through. Pasted below are screen shots of the summary page from the interactive installation program running on Windows. This page of the tutorial will review the summary panel to document the settings you will choose as you go through the installation wizard.
Two install options are not included in the summary page. The Windows installer program presents an option for creating Everserve menus. These menus can stop the Everserve Service, uninstall Everserve and open the Everserve interactive shell Console. The default setting will create the menus. A second Windows option allows you to run the Everserve Service under an account you choose rather than the default "System" account. If run as "System" you also have an option to allow Everserve to "interact with Desktop" and draw windows to the screen when someone is logged in and working on the system. For the purposed of this tutorial you do not need to change these default settings.
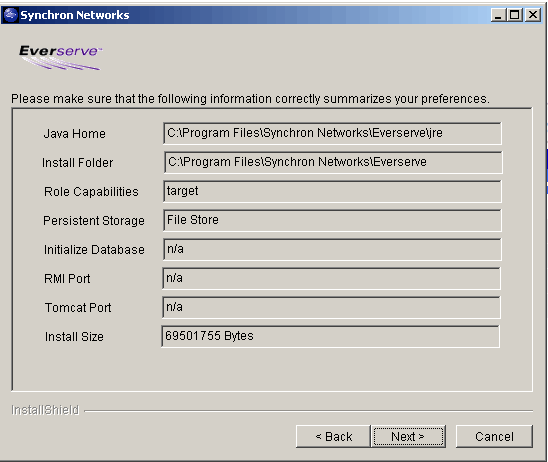
Note that the options for installation on an Everserve system running the community manager, publisher or relay configuration are pictured first while the second image shows the details for a default installation on an Everserve recipient peer.

These configuration settings are set by the Everserve Installer:
The next summary panel shows settings for a target installation of Everserve. The system can function only as a package receiver and does not require a database.

Notice the same settings are listed in the summary. The Java Home setting in this panel is the default value used when the JRE is installed with Everserve. In this case, the default location for installation is used. Only the default role of target is being installed so the system will not use a database. The setting for persistent storage reflects that a file on the hard disk, "File Store," will be used instead. The other settings in the list are not applicable to a target installation and are marked n/a.
Installation of Everserve on Solaris is done with pkg files. Here are the steps:
$ mkdir <install directory>
$ cp <path>/Everserve-1.1-1.11.pkg.tar <install directory>
$ cd <install directory>
$ tar xvf Everserve-1.1-1.11.pkg.tar
To install a CM/Pub
$ pkgadd -a silent.admin -r $PWD/cmPub.response -d $PWD Everserve
To install a target:
$ pkgadd -a silent.admin -r $PWD/target.response -d $PWD Everserve
Everserve will be installed into the /opt/synchron
directory.
After completing installation, you should find the following directories:
/opt/synchron/bin
/opt/synchron/lib
/opt/synchron/server
/opt/synchron/external
/opt/synchron/jre
/opt/synchron/db
Now that Everserve is installed you are ready to define the community.